Assembla To Jira
Migrator - Allows you to migrate Ticket from ASSEMBLA to JIRA.


This tool allows you to migrate Ticket from ASSEMBLA to JIRA, such as the ticket name, description, attachments, links, priority, and history.
To begin the migration process, you need to follow these steps:
- Authenticate using your ASSEMBLA credentials and select the project you want to migrate.
- Fill in the Jira details, including the JIRA project key, instance name, user ID, and API token.
- Click on the "Submit" button to start the migration process.
- Choose to either use an existing Jira project or create a new project and provide a project name, key, and team lead email.
- If you create a new project, customize the "Story" and "Bug" issue types, as well as the "Priority" and "Time Tracking" fields to ensure successful migration.
- By following these steps, you can easily migrate your ASSEMBLA project tickets to Jira and customize the necessary fields to ensure a smooth transition.
To Get Jira Details follow below steps:
Jira Project Key: This is the short form of your Jira project and can be found in Jira software. You can see where it's located in Image.
Jira Instance Name: This is simply the domain name of your Jira instance, which can be found in Jira software. Refer to Image 2.1 for how to locate it.

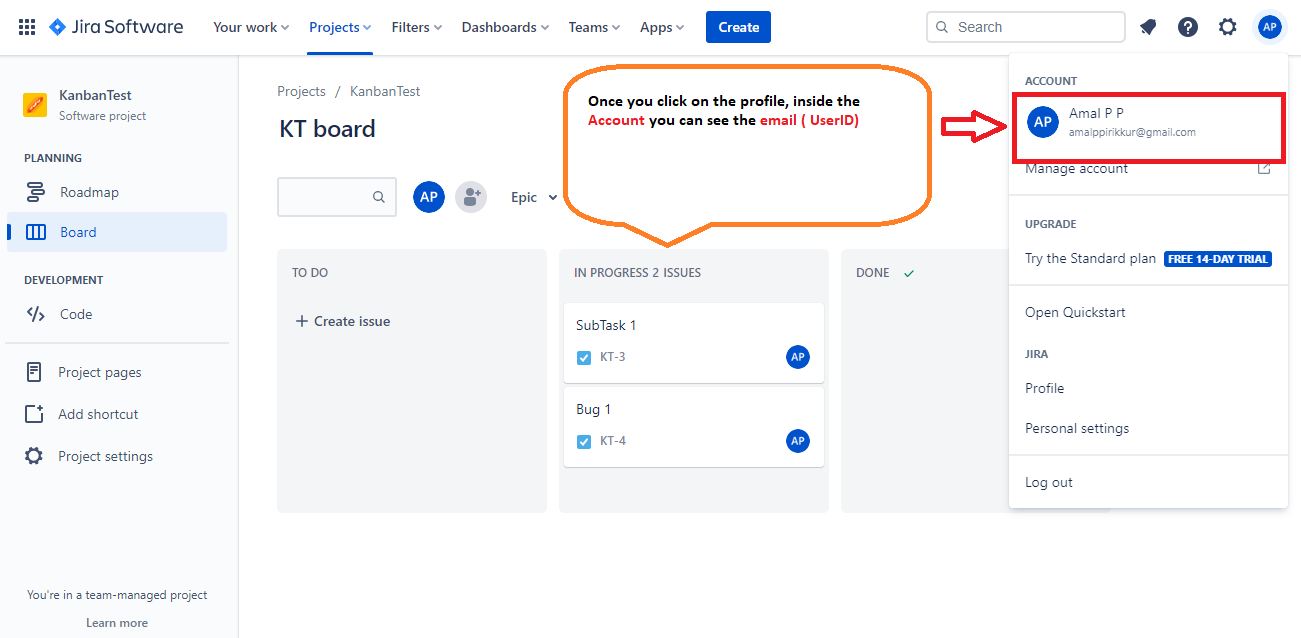
Jira User ID: This can be obtained from your Jira profile. Go to your profile, located in the top right corner of Jira software, and look for your email address within the "Account" section
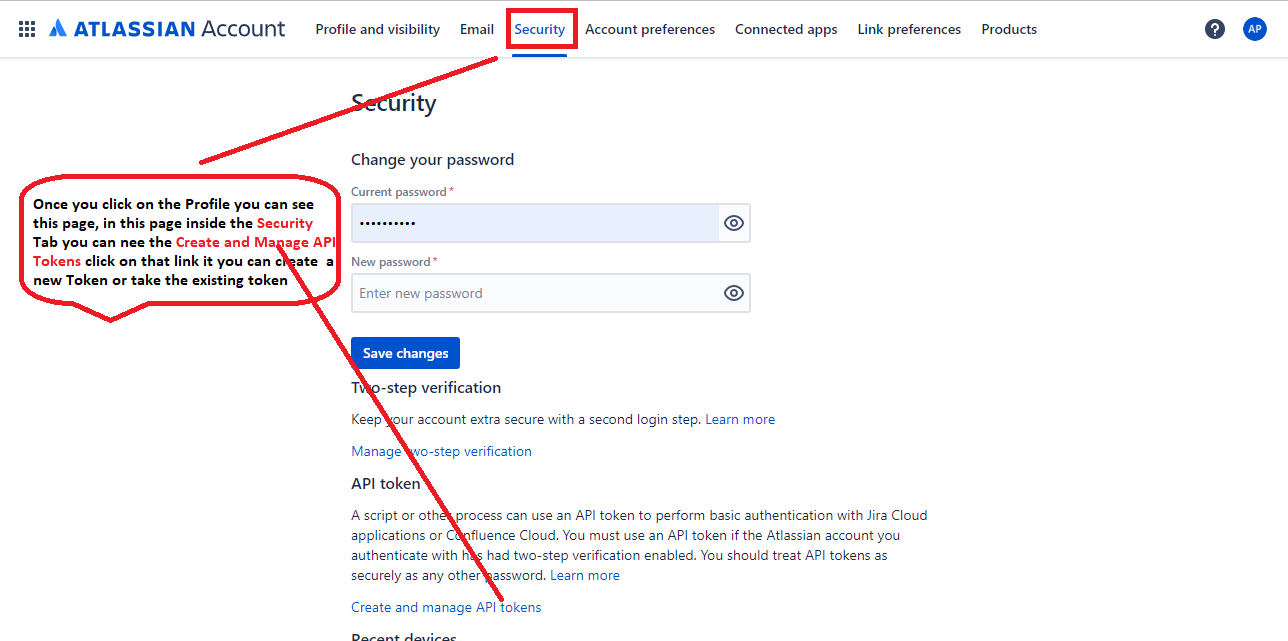
API Token Creation: To create an API token in Jira, follow these steps: go to your profile, click on "Manage Profile," and then click on the "Security" tab. You will see the option to create and manage API tokens there.
How to Register App in ASSEMBLA:
To register an application in ASSEMBLA, follow these steps:
- Click on your profile in ASSEMBLA and select "My Profile."
- In the bottom left corner, select "API Applications and Sessions."
- This will redirect you to another page where you can select the option to register a new application.
- Fill out the following three fields:
- a. Name of the application
- b. Application website
- c. Redirect URI
- Once you have submitted the form, you will receive your ClientID, Client Secret, and Redirect URL. You can use this information to implement OAuth2.0 in ASSEMBLA.

You can reach us Contact Us for more information.